Thursday, December 30, 2010

Man's Shirt into Sweet Skirt

Look who got a sewing machine for Christmas (thanks ma!) !! This was my first ever sewing product on a sewing machine (if you don't count the baby blanet I made in home-ec which said "Ashley" instead of "Baby" lol), so you know it was super easy to do.

Time: I don't really know because it took me half a day to set up my macnine

Supplies:
Man's shirt
sewing machine
ribbon

Steps:

1. Pick out a really cute handsome man's shirt (both the man and shirt should be handsome ;)
2. Cut the part under the pockets off


3. Unbutton it and lay a ribbon across the top brim, leaving about an inch "ruffle" at the top

4. Sew the ribbon on the shirt (I just did the top part of the ribbon only)

5. Sew the gaps in the shirt closed  as to not pull a Brittany
6. Tie it on and be sweet

I think it looks a lot like this one from Urban Outfitters:


Saturday, December 25, 2010

Party for Misfits


My friend Jeremy's massive no-shave-November beard was the inspiration for this year's Christmas party theme. We have had so many laughs from this photo (it even made it on the news), and now it is in the running for Gizmodo's holiday photo contest. :) Please vote for his picture (Click Garrett Hensley, Movie) and get a good laugh at the rest of entries as well :) Thanks!
Here is the FB invite and some more pics from the party:
You are invited to a Rudolph the Red Nose Reindeer themed Christmas party! Therefore, you need to dress appropriately. For example, Worm is coming as Cornelius (which if you haven't seen his beard in a while, this in itself is enough reason to come), and I'm going to be Clarice. Along with our festive attire, I plan to have some elf-sized snacks in Mrs. Santa's workshop (the kitchen) and Abominable Snow Monster-sized games on the Island of Misfit Toys (the basement). All you need to bring is some holiday cheer. :)


Monday, December 20, 2010

Recycled Fabric Loop Necklace

I've been seeing quite a few of these around lately

Time: 10 minutes


Supplies:
Recycled fabric (I got mine for $1 at a thrift store)
beads
stiletto (tool only)
scissors

Steps:
1. Cut fabric into 1 inch strips
2. Tie one end to something
3. Twist tightly

4. Add beads
5. Untie from holder and tie ends together (they will ravel up...this is fine).

6. Submerge in water

7. While wet, hang from a door knob with a wight at the  end. There is more than one way to utilize the power of a stiletto ;)
Cute and I love this color!

Sunday, December 19, 2010

When Life Gives you...

When life gives you lemons  broken limbs, make lemonade stuff.
Last Wednesday good O' East Tennessee had a very beautiful and very dangerous ice storm.

Track behind my house
This one above is my favorite
But, because of the heavy ice, I had some HUGE (even though they don't look big here) limbs fall off of my pine tree. Oh well, I was able to make these lovely things from the branches and have an idea for the rest of the limbs (to come much later).
Tealight candle out of a broken solar light (top taken off), glass vase, and branches from pine tree.
Wreath from ribbon, fake flowers, and branches
Tomato cage tree
Tutorial here: http://www.5min.com/Video/How-to-Make-a-Tomato-Cage-Christmas-Trees-112604931

Thursday, December 16, 2010

"Oh the Places You will Go" Map Shelf and Vacation Memories Display

This has been an idea at least 10 years in the making. I was one of those odd little girls that enjoyed reading decorating magazines while all my friends were reading Teen. In one of the magazines, I came across a picture of this long shelf with tiny bottles displayed on it. Within those bottles were pieces of the earth from all parts of the world. I remembered thinking how wonderful it would be to visit all those exotic places one day. Right then and there, I decided to start my own collection. Now, 10 years later, I've finally begun to display some of my collection and hope to add loads more from many more destinations to come.

Time: 1 hour

Supplies:
Old spice rack
Old shelf
Recycled Map
Trip brochures
Mod Podge

Steps:
1. Gather supplies

2. Measure shelf ledges and cut map pieces to fit
3. Mod Podge the ledges and cover with map pieces
4. Clip with clothes pins and let dry then Mod Podge the tops of map pieces
5. Find travel brochures from past trips and trace spice container lids on chosen picture
6. Glue on top of lids then label locations and dates on the pictures. When dry, Mod Podge over all.
7. Fill containers with elements from your past vacations (shells, sand, rocks, etc.)
8. Display and visit daily for fond memory recollection


I entered this in Crafting with the Stars, so stop by and check it out!

Tuesday, December 14, 2010

Where is Santa Now? Presidential Map

I'm a teacher, so old maps are EVERYWHERE for the taking (why is it teachers never want to throw anything out????). I found this old Presidential map and decided to turn it into a silly "Where is Santa Now" decoration.

Time: 30 minutes

Supplies:
1. Old Map
2. Hat and scarf stickers
3. White paint
4. Glitter paint

Steps:
1. Giggle a lot while putting hats on the past presidents

2. Paint over any unwanted wording
3. Hang Santa from a ribbon (He is warming up in Florida right now ;)

Monday, December 13, 2010

A "Bright" Christmas Tree Idea

Time: 1 hour

Supplies:
1. Old light-bulbs
2. Craft wire
3. Punch nails
4. Ribbon
5. Old frame (I got mine at a thrift store for .50 cents)

Steps:

1. Spray paint the old bulbs

2. Nail in punch nails and tie craft wire to each
3. Tie ribbon around each light-bulb and string onto wire hanger
4. Hang with cute ribbon

Saturday, December 11, 2010

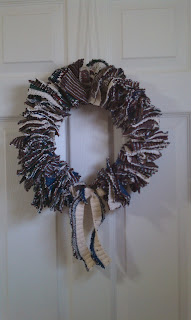
Bad Sweater Wreath :)

Lauren's "Ugly Sweaters Couldn't be Better" party 12/10/2010
Have you been to your annual Bad Sweater Party yet? If so, you can turn that bad sweater into a good wreath for your door :)

I found this idea here: Green Eyed Monster 

Time: 1 hour

Supplies:
1.Wire hanger
2.Ugly Sweater
3. Scissors
4. craft wire

Steps:

 1. cut out neck and sleeves of sweater
2. Cut into long strips then into squares
 3. Thread through wire while ever so often making a "spacer" out of the rim of the sweater.

 4. Once you get to the end, wire the ends together and cover with remaining scraps of sweater
Then, as an added bonus, you can wear the sleeve to your next Christmas party ;)