Showing posts with label vintage camper renovation. Show all posts

Monday, May 20, 2013

1971 Aristocrat Camper Remodel Before and After

The Jones has come a long way since November. Here is the progress I've made on him in five months.

Before:


Despite the condition of this 1971 Aristocrat, you can tell I how ecstatic I was to get it for $450. lol 


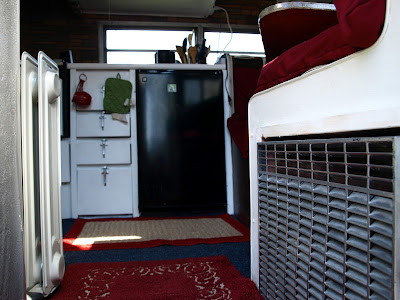
After


 Painted over that awful, 70's blue 

 Spray painted all of the hardware shiny silver 

 Put to use some wedding decor ironed on decals to thrift store pillows

Sewed lazy-(wo)man slipcovers using $5 Wal-Mart Sheets 

Spray Painted the outside white and hunter green 


Left to do: 
1. Install an air conditioner
2. Sew an awning 
3. Paint an outdoor rug 


Flannel Bombing the Camper

Turns out we love flannel.

Maybe a little too much.

Nah, that could never be ;)

Instead of paying tons for fabric to make new curtains for our vintage camper, I hit up my local thrift store on a sale day and brought home a bag full of flannel shirts for $2.

Then I cut all of the large portions off and lined them up.

Then I sewed them together one by one and added a loop thingy at the top to put the curtain rod through.
It only took me about one hour to do this project, and I absolute adore my custom made curtains for our little camper :)

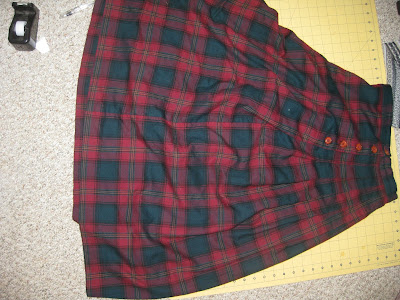
Also, while I was at it, I took a flannel skirt , made one cut (cut the waist off) and sewed a pillow out of it. Love.


Friday, February 8, 2013

DIY Counter Tops...Finished

The camper's counter tops are now finished! See the first steps in this post. I really love how they turned out! However, if I were to use this method in my house (which I very well may do), I would make the first coat of color a solid and even color. I was going for a rustic/stone/granite look, and this is exactly what it turned out like. As you can see, the black paint under the stone paint is a little uneven, but I think that achieved the look I set out to obtain.
Remember is what they looked like before:
And here is after:
After all of the camper updates are complete, hopefully I will be able to get some better pictures for you :)

Monday, January 21, 2013

Camper Progress and DIY counter tops


UPDATE...FINISHED TOPS:
Click Here 


I'm making progress with my vintage camper renovation! You may think that the cold and snow would have put a damper on the camper work, but no, it's warm and toasty in "The Jones," and I've managed to put a few hours into to it each week. What I'm working on today are the counter tops.
As you can see (or maybe not from the dark and horrible photos), is that I was working with some U.G.L.Y tops and had nothing to lose, so I tried out this tutorial on using American Accents Stone Spray Paint to create a faux granite look. The tutorial used the sand colored stone paint, but I went with a darker choice.

Steps:
1. Tape everything well
2. Spray paint the base layer using just regular and cheap spray paint. It doesn't matter if it's all well covered or not because you will be covering it up with the stone spray paint.
3. Let dry and then spray on the stone spray paint.
4. Let dry for a long, long, long time. Every time I checked my stone paint, it was still damp, so I ended up letting it dry two nights before moving on to the polyurethane.
5. Polyurethane. This is the step I'm currently on. I applied my first coat today, and now, I'm going to let it dry over night before applying the next coats


There's the sneak peak! I will post the finished outcome in the next week or two! I can't tell they are going to be so so so much better than what was in there :)

Cost:
Cheap black spray paint $2
Stone spray paint x2 $10 (I ended up using 1 and 1/2)
Polyurethane  $8
Total = $20

UPDATE...FINISHED TOPS:
Click Here